I have gotten more questions about the sun hoods than anything else on our bikes. Here is a write up about how I put them together and how they work for us.
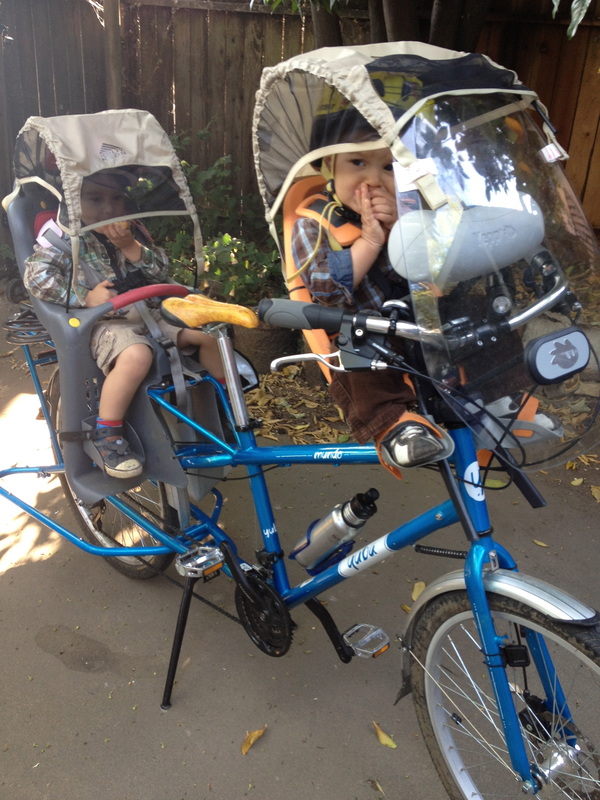
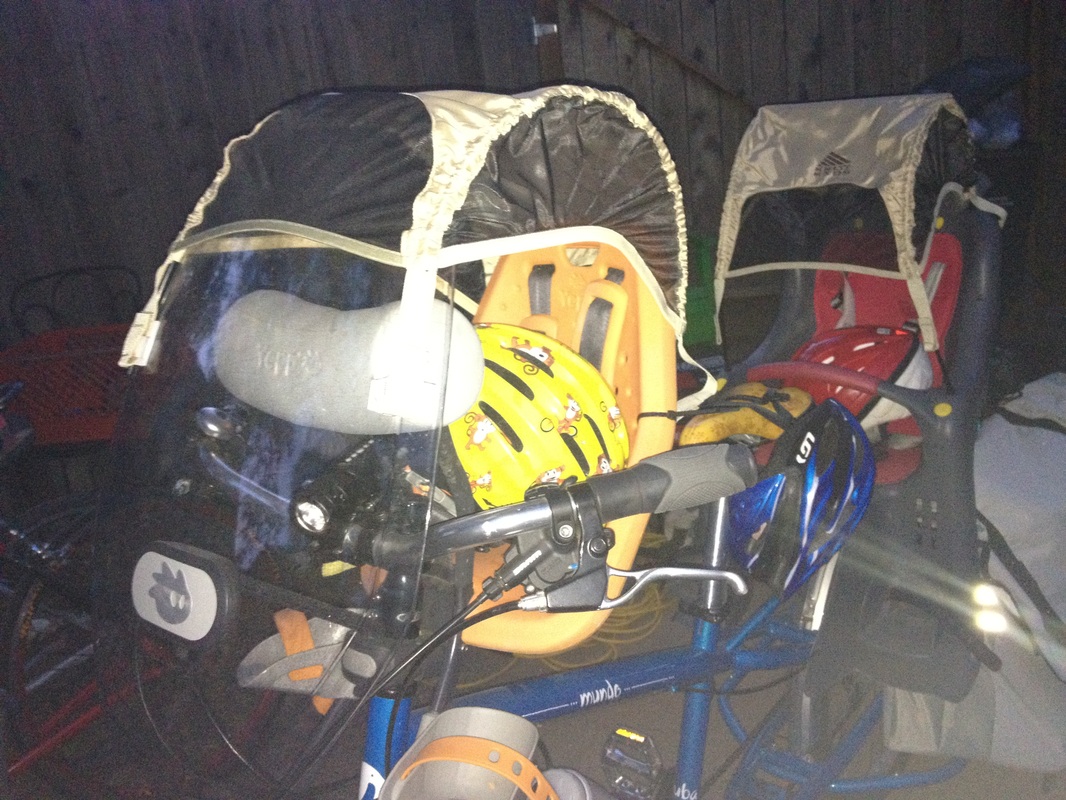
It is very important that if you are going to be out riding with the kiddos that they stay comfortable. I was worried about the impending summer heat and UV rays so I quickly set about fixing a weather protector for my two boys. We ride our Mundo "minivan" a lot! I had seen one done for the Peanut Shell that I tried but wasn't able to get it to work as well as Lindsay was and I still didn't have a solution for Little Brother up front. After a bit more searching on the Great Internet, I came across another design. This one used Kelty Sun Hoods (mine were on sale for $15) for backpacking backpacks. I liked that these gave full overhead protection as well as a bit of a screen in front. Sacramento gets lots of dust and debris so this gives me a little peace of mind when we are forced to ride through the cottonwood forests.
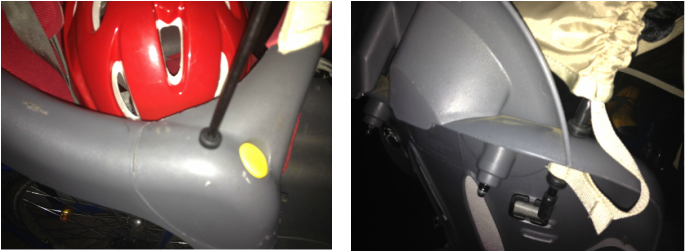
For the Peanut Shell, I followed the blog's directions and drilled two holes along the top of the seat and two more on the sides. The original design had the holes in the front bar but with Big Brother getting bigger, he already has trouble getting in and out with the bar, I often take it off. I didn't want the poles to poke him in the legs. A couple of grommets and some electrical tape to keep them from falling off (you might want to get tighter grommets) and it was good to go. The front poles don't even have anything holding them in. Big Brother is able to pull them out but the angle that they go into the holes makes it so they don't fly out on their own.
For the Peanut Shell, I followed the blog's directions and drilled two holes along the top of the seat and two more on the sides. The original design had the holes in the front bar but with Big Brother getting bigger, he already has trouble getting in and out with the bar, I often take it off. I didn't want the poles to poke him in the legs. A couple of grommets and some electrical tape to keep them from falling off (you might want to get tighter grommets) and it was good to go. The front poles don't even have anything holding them in. Big Brother is able to pull them out but the angle that they go into the holes makes it so they don't fly out on their own.
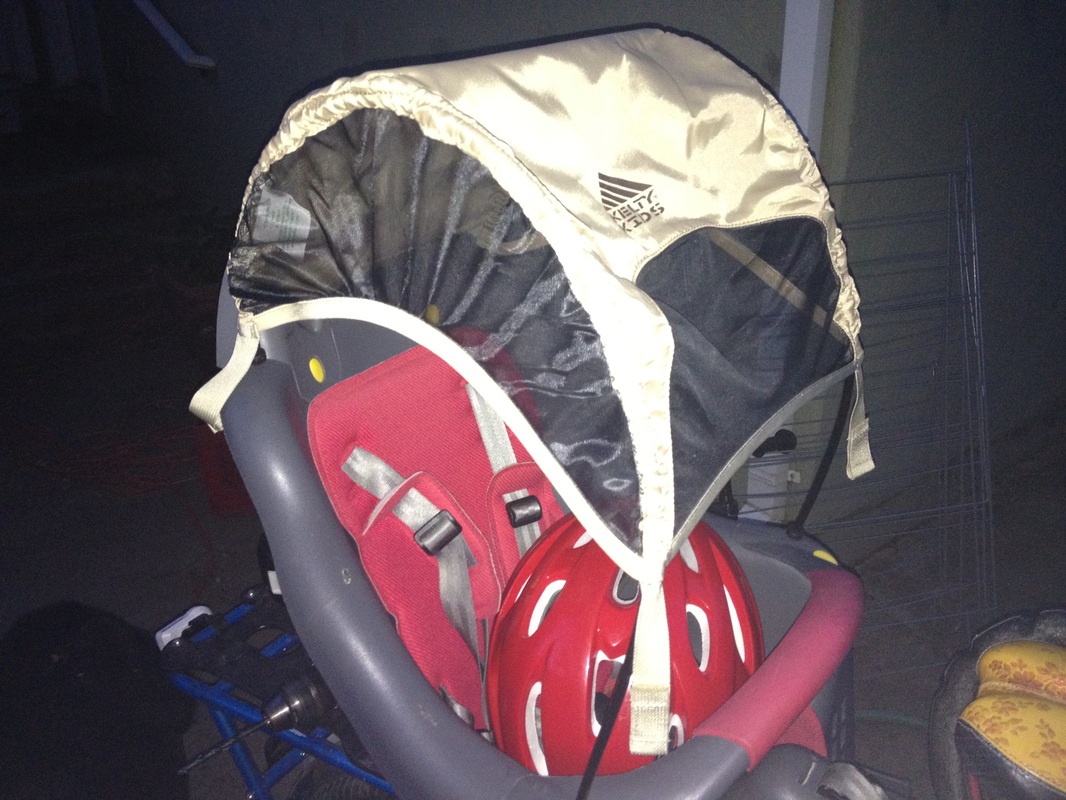
Finished product.
The Mini Yepp was actually even easier to put together since I didn't have to drill any holes, thanks to its holey design. I was using the Yepp Mini Windshield to keep the debris out of Little Brother's face ever since I found a stick in his eye. That worked pretty well but I still wanted the sun/rain protection. I was a bit worried that the cover would impair my riding since it makes it impossible for me to see the ground directly in front of me but as it turns out, I don't ever really look at the ground directly under me while riding. The only issue is that I can't see my bike computer to find out how fast I'm riding unless I peer around the cover. That's probably a good thing for me not to focus too much on it anyway.
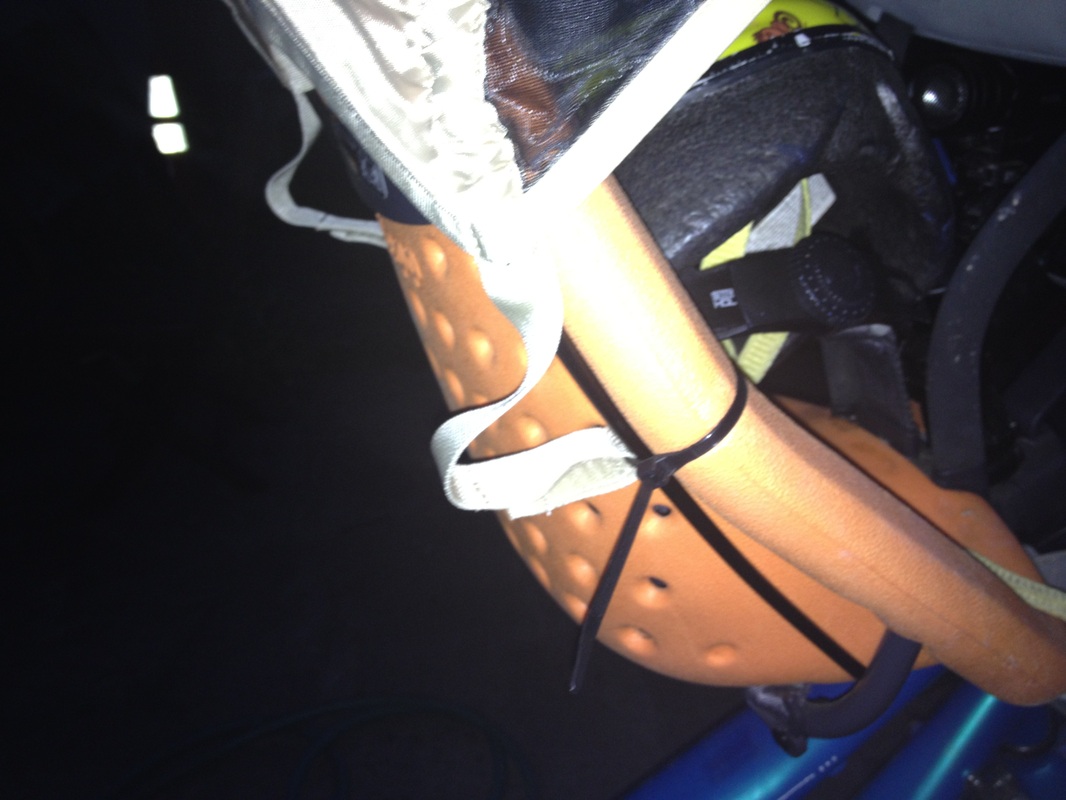
I first attached the back poles with a couple of zip ties and tucked the ends of the poles into the bottom bars of the seat's frame. It is the opposite of the Peanut Shells design where I have a lot of pole in the front and not so much in the back. The Mini Yepp has most of the cover's pole in the back and not as much hanging off the front. For the front attachments, I have the cover hanging over the windshield and am using outdoor Velcro to adhere it on. The little velcro straps of the cover loop around the velcro and are holding, so far. I worry about the heat melting off the adhesive but if needed, I can either drill holes into the Yepp bolster or use ties to attach the cover's loops to the handlebars/Yepp's handlebars. I've even ridden the bike without the front poles attached and unless there is a strong wind, it's not a problem. I wouldn't recommend riding like that always but if the velcro were to come off, you could still get to where you needed to go and ride until you had a chance to fix it.
I first attached the back poles with a couple of zip ties and tucked the ends of the poles into the bottom bars of the seat's frame. It is the opposite of the Peanut Shells design where I have a lot of pole in the front and not so much in the back. The Mini Yepp has most of the cover's pole in the back and not as much hanging off the front. For the front attachments, I have the cover hanging over the windshield and am using outdoor Velcro to adhere it on. The little velcro straps of the cover loop around the velcro and are holding, so far. I worry about the heat melting off the adhesive but if needed, I can either drill holes into the Yepp bolster or use ties to attach the cover's loops to the handlebars/Yepp's handlebars. I've even ridden the bike without the front poles attached and unless there is a strong wind, it's not a problem. I wouldn't recommend riding like that always but if the velcro were to come off, you could still get to where you needed to go and ride until you had a chance to fix it.
Zip ties
I have since replaced the velcro and used a bigger piece on each side.
The sun shades/weather protectors have been a great addition. It gives the boys their own little "pod" and more protection from the elements and maybe even a little more privacy. Bikers are exposed more than drivers and we get a lot of attention where ever we go. I'd like to think that this helps my wee ones feel a bit more protected and keeps them from being too overstimulated. The covers also say that they are "rain resistant." We haven't had any downpours yet but it will be nice to have something to keep them a little dryer and warmer as the seasons turn. This also provides a great foundation for any added stroller rain/sun covers that I might want to add in the future--which would probably be necessary if you lived in a climate with more extreme weather than Sacramento.
It is a little more work to get the boys in and out of their seats but not by much. Both designs leave the poles free enough to easily pull out and tuck back in as needed. Big Brother does this on his own while getting in and out. Little Brother can usually get in/out without changing the poles but if needed, I can open the velcro tabs and tuck one of the poles out of the way, opening the cover up. The amount of protection if gives makes it totally worthwhile. As long as my boys are happy, comfortable, and safe, we'll be able to ride forever.
It is a little more work to get the boys in and out of their seats but not by much. Both designs leave the poles free enough to easily pull out and tuck back in as needed. Big Brother does this on his own while getting in and out. Little Brother can usually get in/out without changing the poles but if needed, I can open the velcro tabs and tuck one of the poles out of the way, opening the cover up. The amount of protection if gives makes it totally worthwhile. As long as my boys are happy, comfortable, and safe, we'll be able to ride forever.
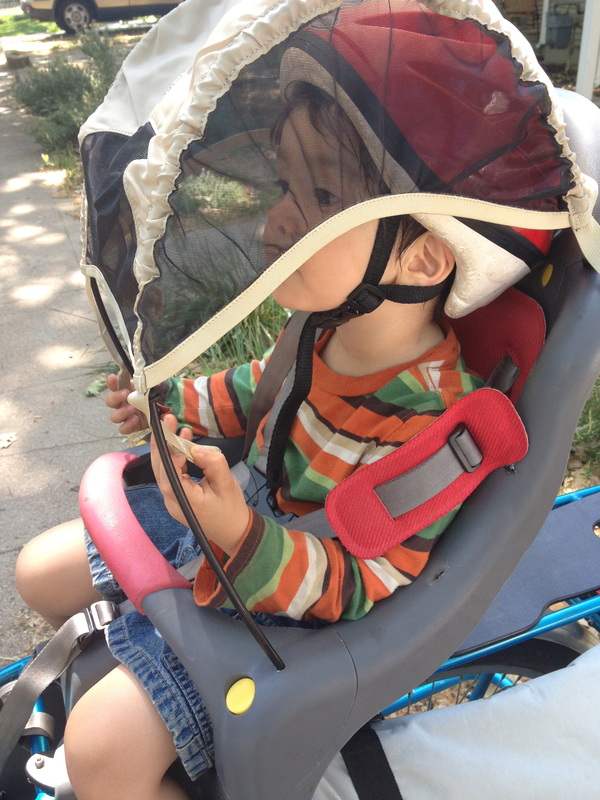
Cozy, cozy!
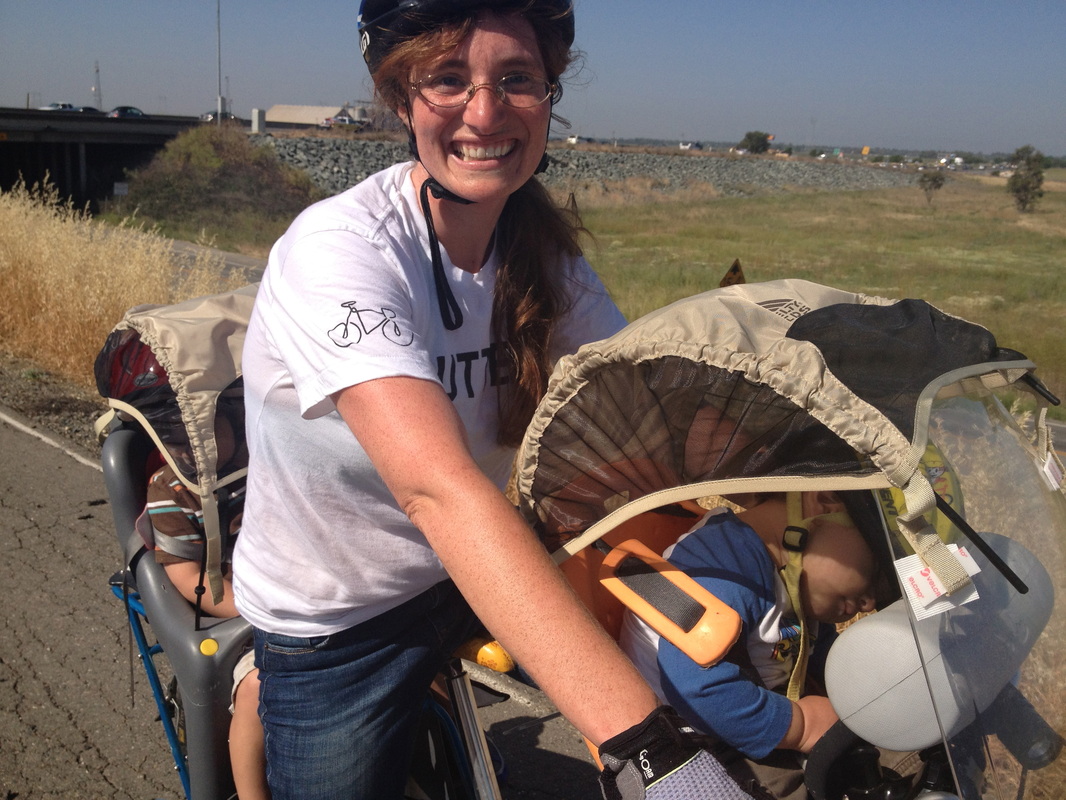
Portable crib! (The amount of velcro has drastically increased for more durability).
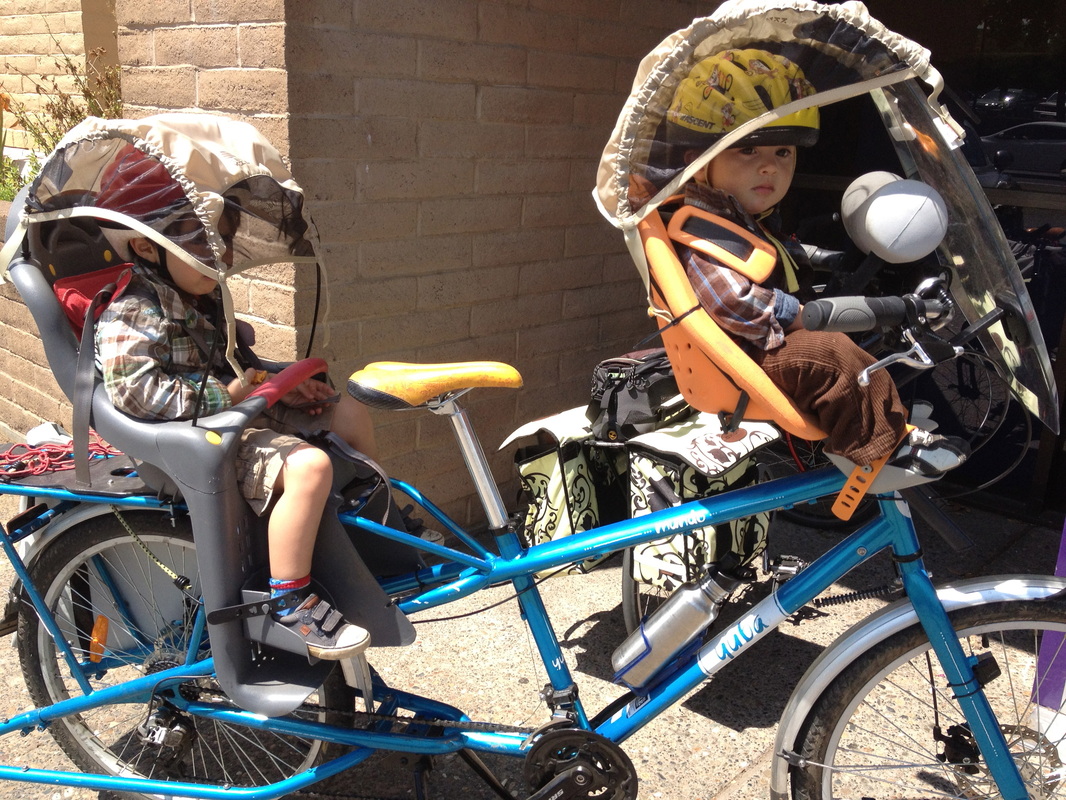
Happy riders!
 RSS Feed
