Tiny Helmets Big Bikes
Check us out!
  • Home
  • Us
  • Blog: We Ride
  • FAQ
  • Our Fleet
  • Adventures
  • Getting Started
  • Contact Us

Jason asks: Cargo bike on a car rack? 

5/24/2015

1 Comment

 
I noticed you guys put the HaulaDay upside down on a saris rack on the Prius. I have the same rack on my subaru but I am having trouble getting the bike to fit tight… any suggestions or modifications that you guys did? Thanks!

We're lucky that we don't have to drive very often but when we do, we love taking our bikes with us. It's great to be able to extend your biking range or to get your bike to a new location that might be too far to safely/reasonably bike to. It can be tricky to get a cargo bike on the back of a regular-sized car but it's not impossible. Here's what we've done. 

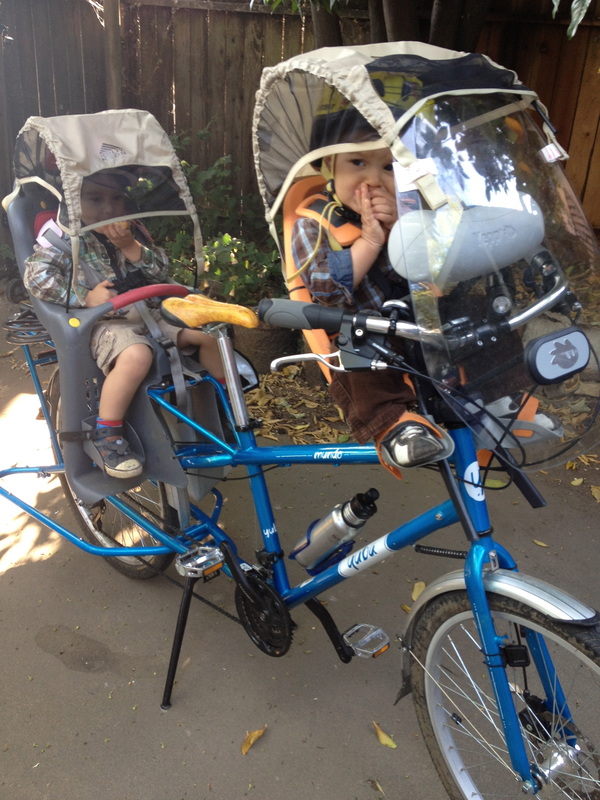
My parents have a Prius that we sometimes borrow and we have a Saris 3-bike trunk rack, nothing fancy. We went with the 3-bike rack because it's nice to be able to bring as many bikes with us as possible, and I realized that if a rack is sturdy enough to carry three bikes, it's probably okay for one giant bike. The first time we tried to get a cargo bike on that rack, it was actually the Mundo, an 80ish pound cargo bike. I stripped off everything that could be removed to lighten the weight just slightly, then managed to hoist it up and strap it down with every tie-down I had. 
Picture
Notice how the bike sticks out on either side of the car and the tail end is raised due to the sloping top tube. Since most of the weight is in the back, I have the back of the cargo bike as close to the rack as possible. We made it all the way home, about 40 miles at about 50mph that day, without so much as a wobble. 
Picture
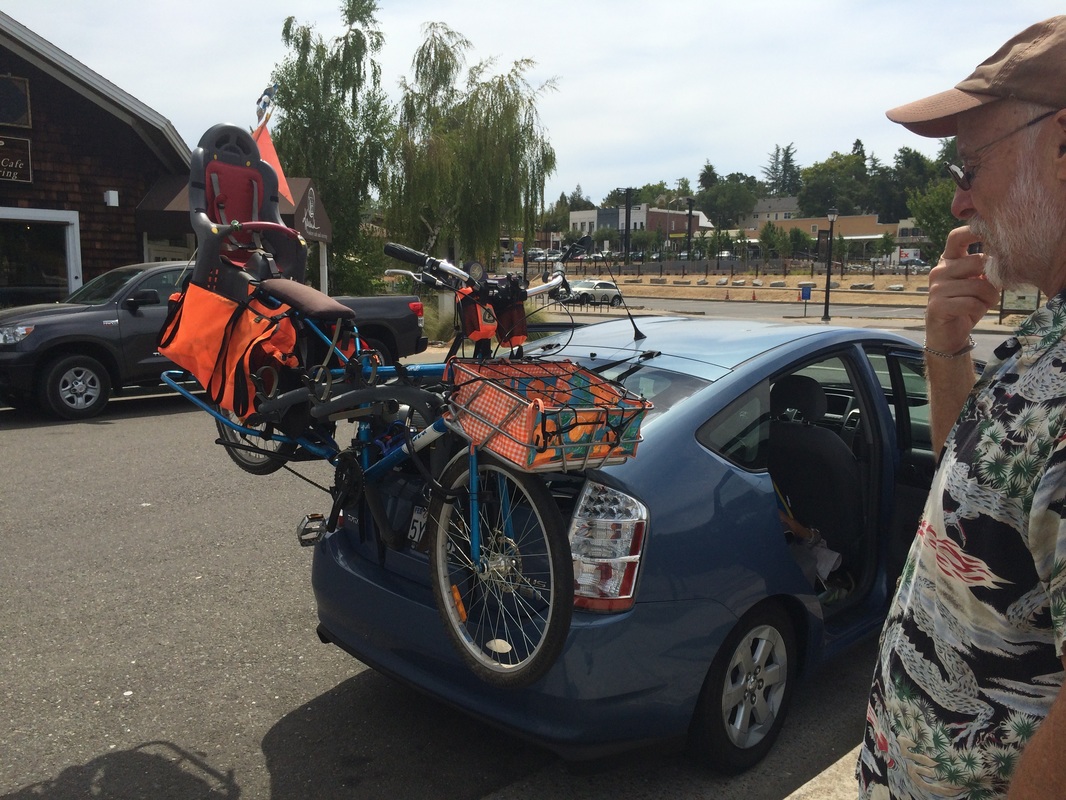
The next time we tried it, there was more weight on the bike with the addition of the front basket and bags. There was a noticeable difference in the car's handling on the freeway. It was as if the bike was a giant sail. Removing the bags wouldn't have done much as there were wheel skirts underneath. Something to consider if you're going very far or trying to get there quickly. 

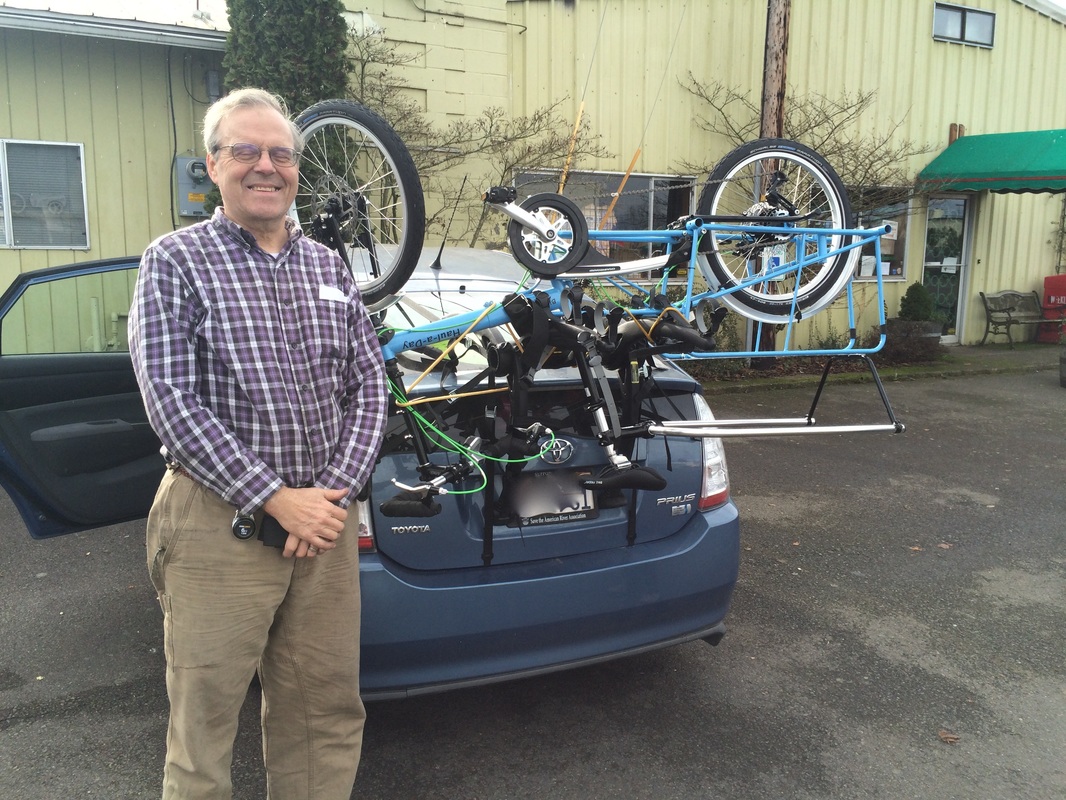
Our next cargo bike-on-car experiences have involved the Haul-a-Day. This bike only weighs about 40 pounds and is shorter but has some unique tubing to deal with. I had originally bought a crossbar adapter for the bike so it could fit across like a "normal" bike but the adapter didn't fit and I didn't want to wait.
Picture
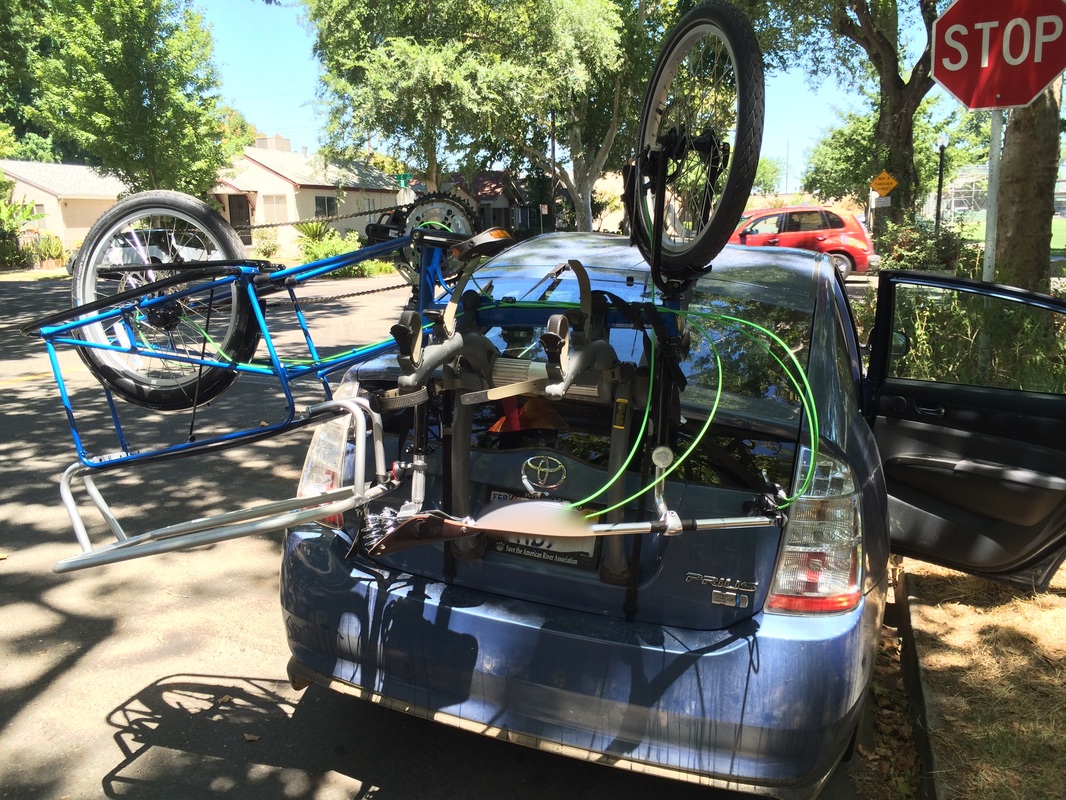
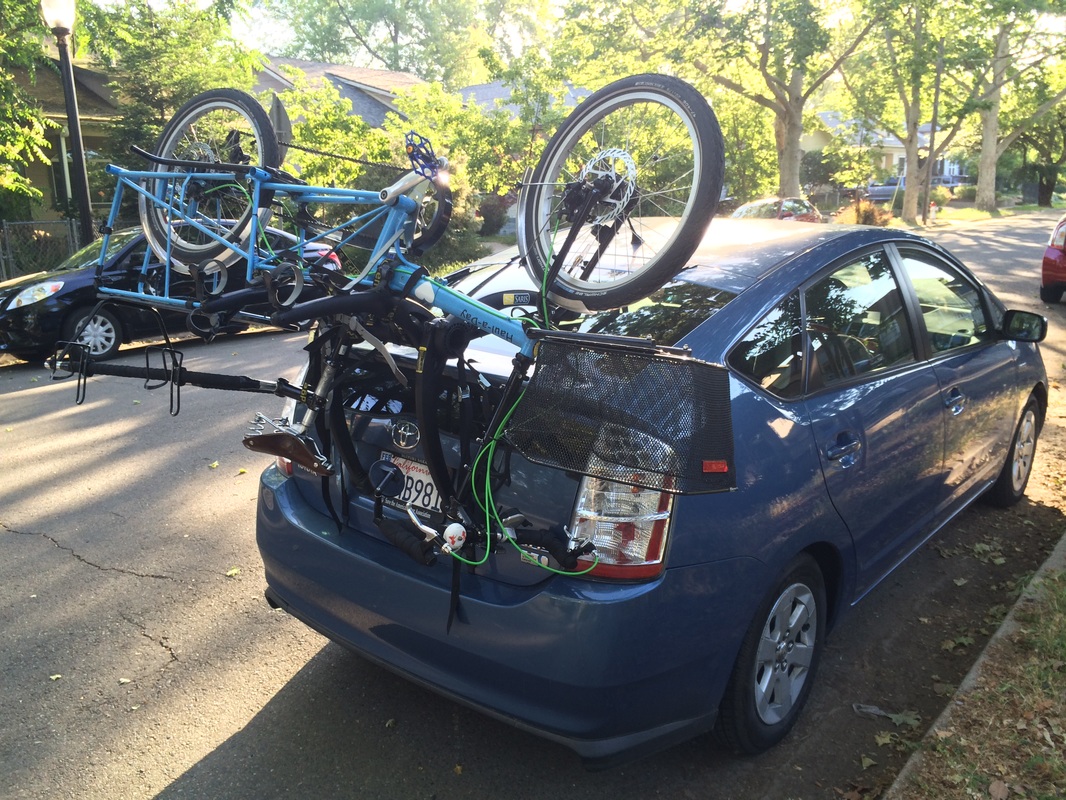
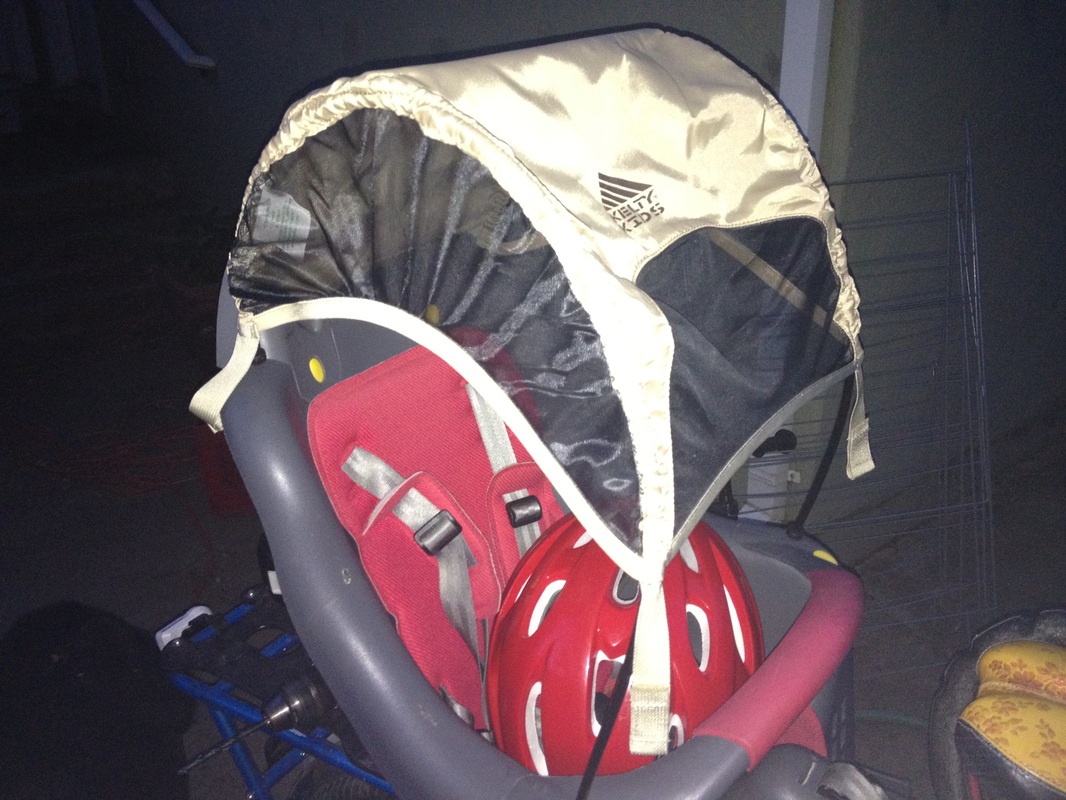
My first attempt wasn't great. I realized quickly that all the weight was on the bottom of the bike and it was too heavy to have upright. Putting it on the rack upside-down made it more stable but the weight still wasn't balanced well. Notice how much the bike sticks out on the driver's side. The ride was only 3 miles across town on city streets but it was terrifying. I analyzed each bump and vibration trying to decide if it was swaying too much. One of the plastic snap-downs of the rack arms broke (this was an older rack and the parts had weakened in the sun). We barely made it home. 

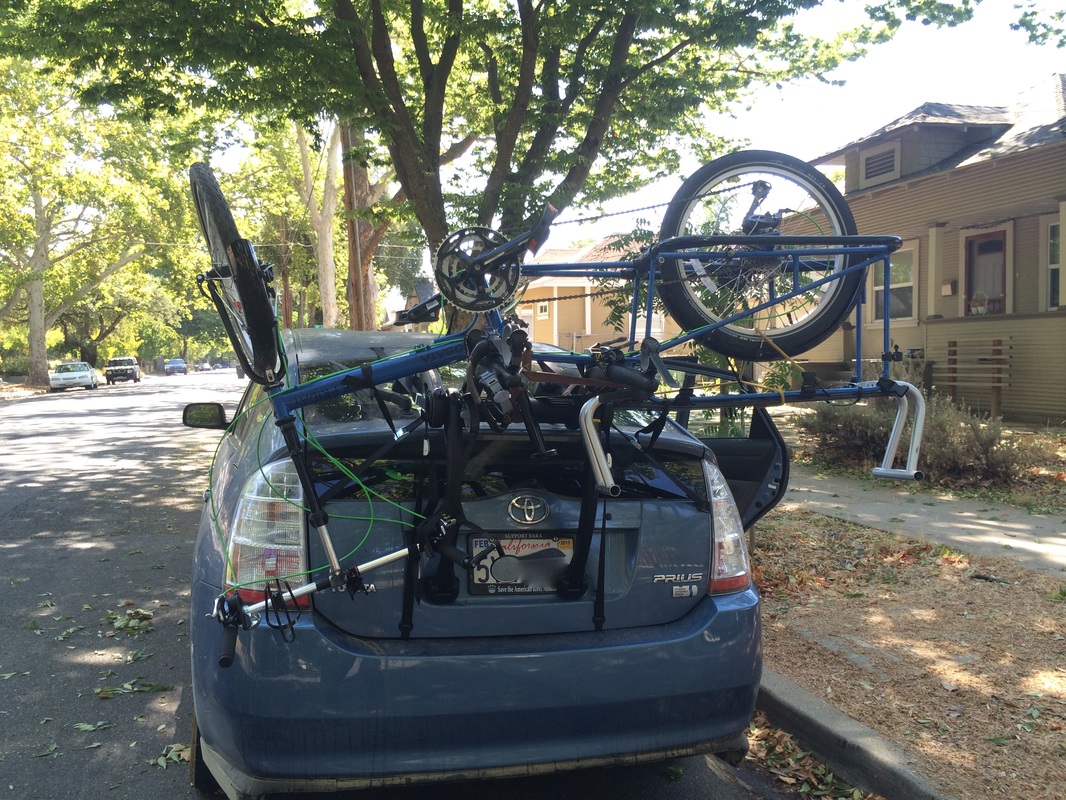
For my next attempt, I had had a little more time to decide how to set up the bike and I had to make sure it was secure as we were driving up to Eugene for the next 10 hours. We had a new rack (same one) and about 4 different types of tie downs. 

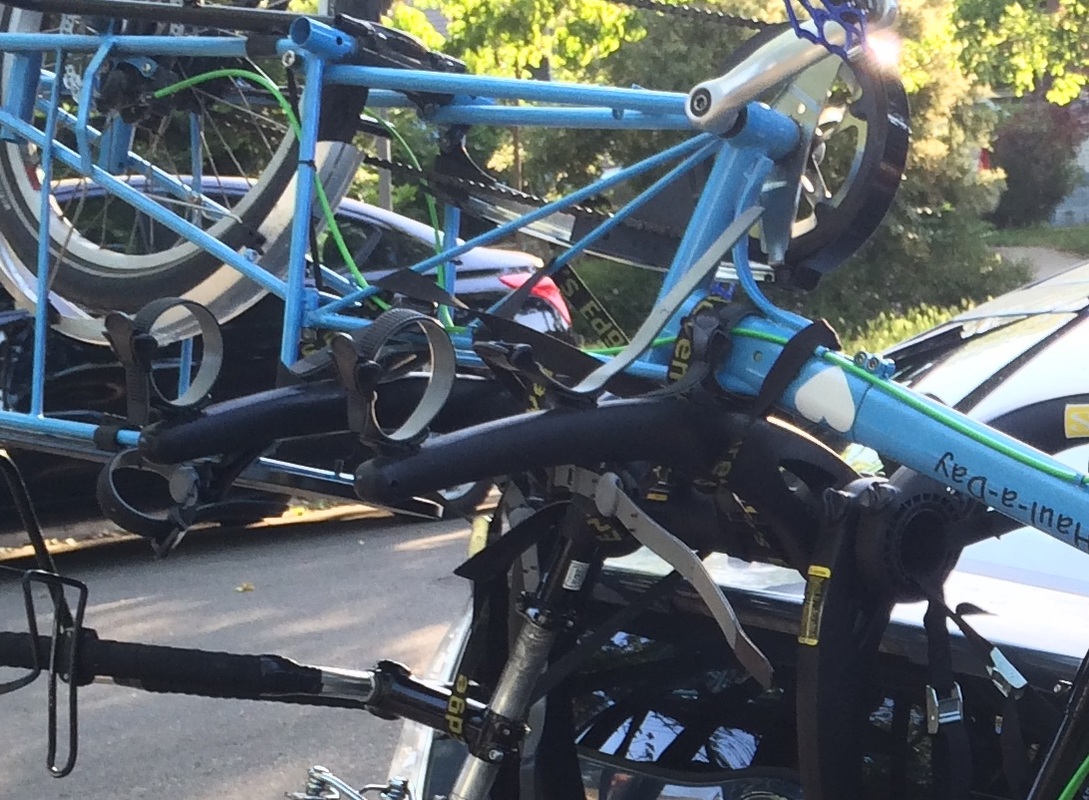
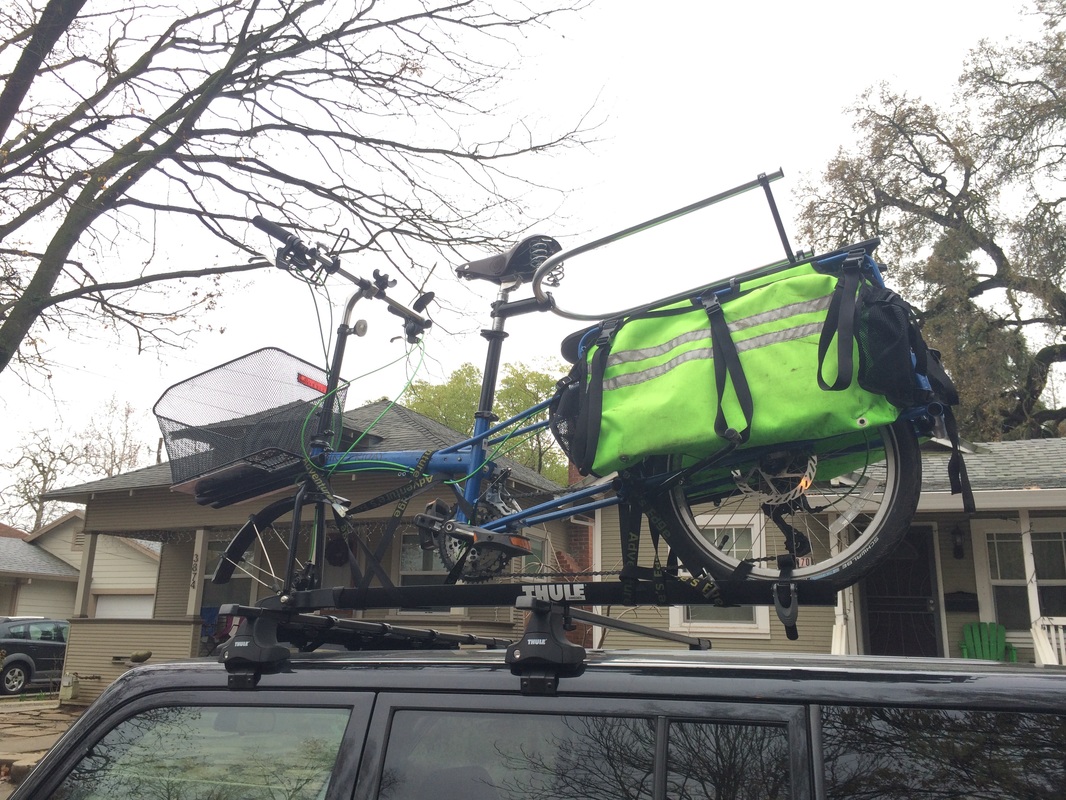
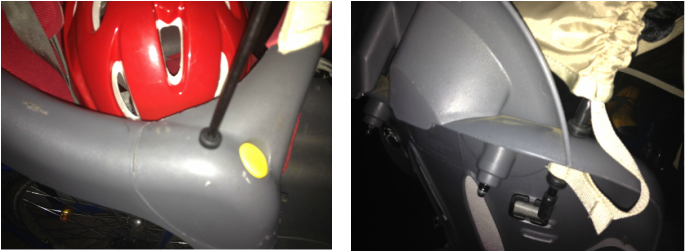
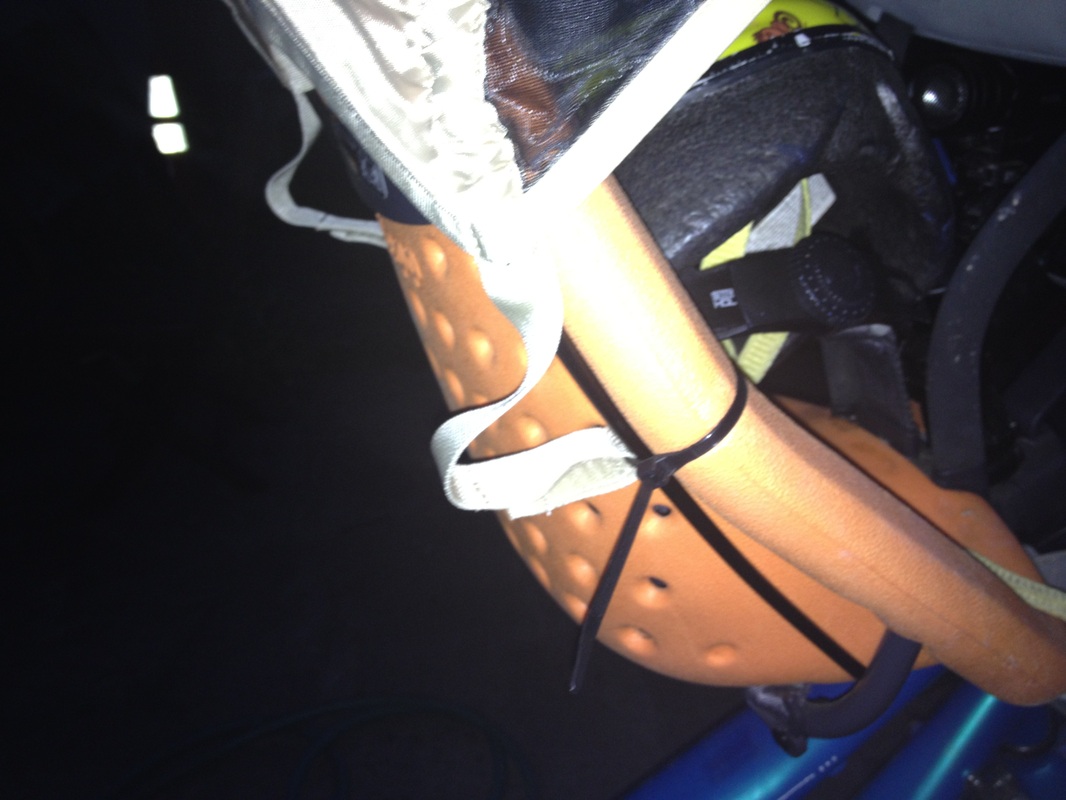
This time, I placed the bike upside down again but with more of the rear weight closer to the rack. This meant that the part of the frame that was on the rack was right in front of the seatpost and the front of the deck. The bike was more balanced in weight and the additional tie downs held everything securely. We drove the whole way at (slow) freeway speeds and the bike didn't move once. 
Picture
Picture
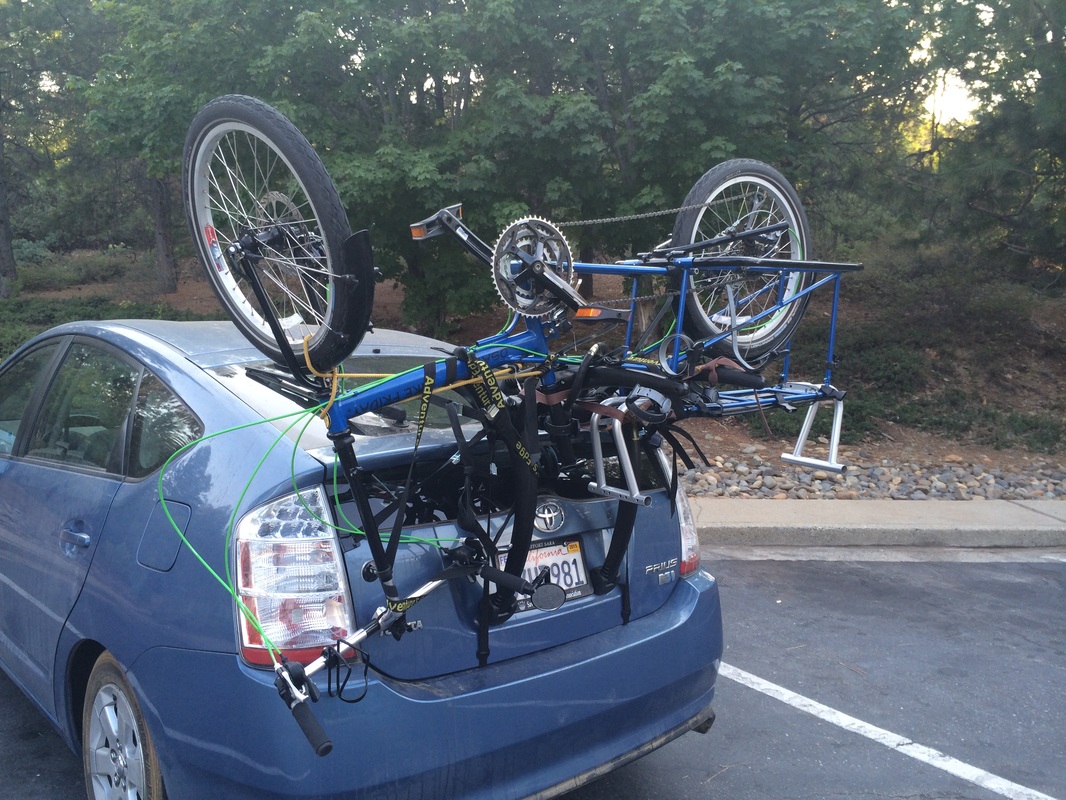
So now, we've got the system down! We've driven a handful of times with both Haul-a-Days. My tips: 

1. Remove as much as you can, especially anything that could fall off if jiggled a lot and anything that catches the wind

2. Find the bike's true center of balance and try to hang it on the rack from there. 

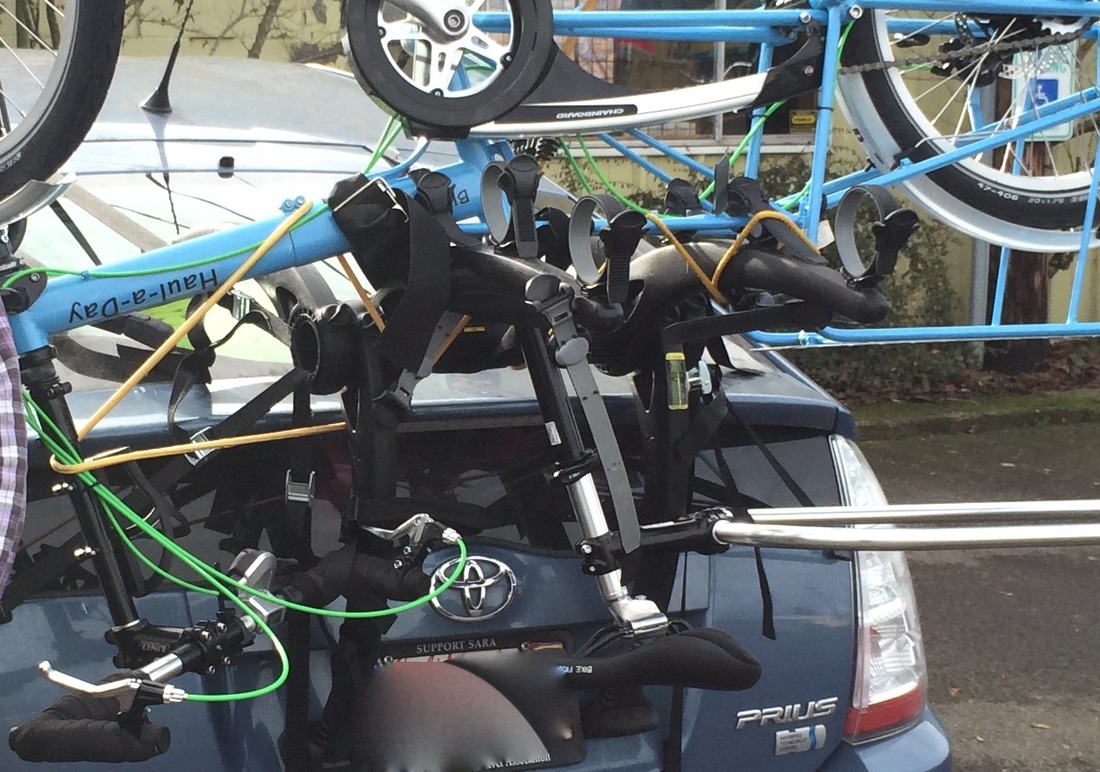
3. Use as many tie downs as possible. With the 3-bike rack, I can usually get the tubes of the rack to fit into the slots where two different bikes would go. The snap downs that would usually attach to a seat tube can hook to the seatpost instead. Get creative and then use extra bungee cords and cam straps as extra securing, to keep the front wheel/handlebars from bouncing into the car, and for peace of mind. 

4. Unlike with the Mundo, I can actually do this all on my own but it is much easier to have a second set of hands to help. 
Picture
Hi, Alan!!!
Picture
Picture
Picture
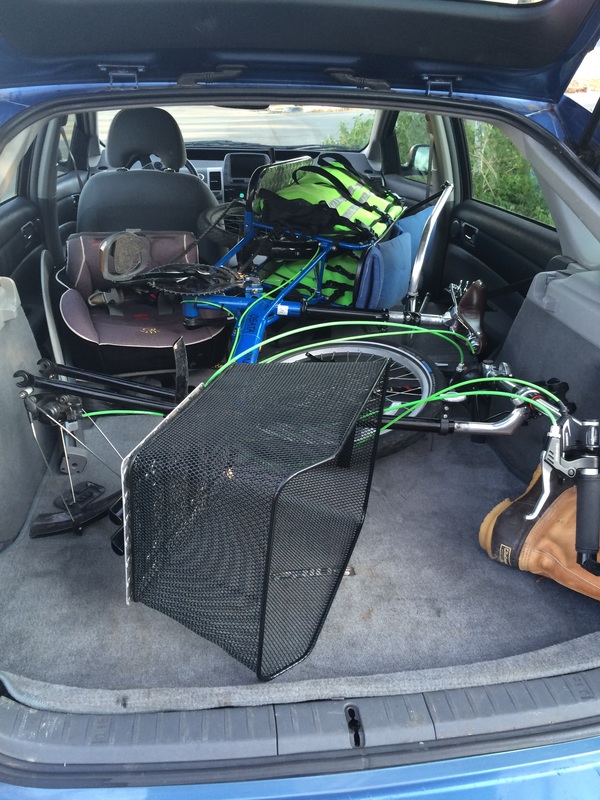
And if you don't have any passengers: 
Picture
Or if you have this kind of rack (front wheel and disc brake removed, handlebars turned 180 degrees, no need to take off bags unless there's a wicked crosswind):
Picture
More adventures by bike! 
1 Comment

Francine asks: Tips to be a better biker and driver? 

6/22/2012

1 Comment

 
Francine says: I'm not an experienced biker and since you are, what about a quick rundown of dos and don'ts for both drivers and those new to biking. It could give us something to think about as riders but also help us out as drivers when sharing the road with cyclists. Like a dumbed-down version of what you know and deal with on a daily basis. I know I'd find something like that helpful, maybe others would too?

Respectful Drivers

  • Always be looking out for bikers, be aware that we are everywhere. Be especially careful around kids on bikes as they tend to be less predictable.
  • Understand that we are not usually being jerks but are dealing with hazards and other issues that you may not be aware of. 
  • Always give at least 3 feet of space when passing. This is now a law in many places and if it isn't, it should be. If there is not 3 feet of space to pass, be patient and ride slowly behind (at a safe distance) until there is. There is nothing so important that you need to sideswipe a biker to get there. Often, you don't realize how far your mirrors come out. Give more space than you think necessary and bikers will be eternally grateful. 
  • Put away your sandwich, lipstick, and your cell phone. Be sober! Treat driving as a privilege, not a right. Remember that cars can and do kill, and it only takes a moment of distraction for something terrible to happen.
  • Wait for bikes to pass before pulling into a bike lane to park/turn. (There is little I hate more than having a car stop right in front of me and expect me to swerve into traffic, just so they can get that sweet parking spot).
  • Don't assume we are all jerky bikers who think we are better than everyone else. 
  • Ride a bike. The best way to understand bikers is to become one. Know what it is like to be passed within inches, to start slowly at a stop sign with cars bearing down on you from behind, why bikers sometimes can't use bike lanes or use sidewalks and sometimes need to use a full traffic lane. 

Respectful Bikers

  • Don't assume you have the right-of-way, even if you do. Don't take a turn that is not yours, even if the driver(s) see you and wave you through. Just because that driver stopped doesn't mean the others will.
  • Don't assume people see you or know how to drive around you. 
  • Always be aware, present, and alert. Be sober. 
  • Continuously look around, plan your route around hazards, and have escape plans for possible dangerous situations. 
  • Watch out for drivers' blind spots and opening doors. 
  • Ride predictably. Use turn signals properly. Ride in a straight path, don't zip in between parked cars. Make eye contact with drivers, bikers, and pedestrians who might be getting into your path. 
  • Try to use education rather than profanities when  interacting with a less-than-perfect driver.
  • Use your bell and a kind "on your left" when passing other bikers, pedestrians. 
  • Stay off the sidewalks, ride as if you were a car, remember to obey traffic laws, ride with the flow of traffic. 
  • Don't be that jerky biker who thinks they are better than everyone else. 
  • A smile and wave goes a long way in reinforcing drivers' good behavior and reminding people that you are a real person and appreciate their help in keeping you alive. 
1 Comment

Josette asks: How to get comfortable on a cargo bike

5/23/2012

2 Comments

 
Hi there! I've been reading your blog while considering getting the Mundo for my own family/cargo needs. I did a test ride with my two-year-old in the peanut shell and the ride was wonderful but I actually tipped over the bike while trying to walk it out of its parked spot -- the bike all loaded up weighs more than me! I was wondering if you have any advice for new cargo-bike riders on how NOT to tip the bike over.

Cargo bikes do handle differently than other bikes, especially when it is loaded up. Almost always, if you're going to fall, it's going to be while you are mounting/dismounting. I recommend to start riding your new cargo bike in an open, empty location so you can get a good feel for how the bike moves without also having to deal with outside distractions. Practice turns, swerving, circles, hopping on/off, etc. You can try getting on and off the bike next to a curb so your foot falls flat and stable on the surface or lower your seat in the beginning until you are more comfortable (not recommended for long rides but it's a good starting point). Also, try to make sure your bike's load is evenly balanced and if possible, keep the weight close to the front of the rack. If one side is heavier, it is easier to lose control. Once you get more comfortable and confident while riding your cargo bike, you will be less likely to tip. Walking with the Mundo is a bit difficult, too. Keep one hand on the brake to help stabilize and move slowly. I also use my hip to help hold up the bike and keep both hands on the handlebars. 

That said--tipping happens. Sometimes, it's nice to get that first fall out of the way so you can see that it actually does less damage than one would believe (but I don't advocate doing it on purpose, of course). I have found that I am able to ride with a higher seat now, take tighter turns, and go faster because I am more used to the way my Mundo handles. One last piece of advice: regularly remind your little one to not make too many sudden moves :)
Picture
2 Comments

Patrick Asks: Does the Mini Yepp fit on the v.4 Mundo? 

5/22/2012

0 Comments

 
I'm thinking about buying a new Mundo (latest version). Do you know if the YEPP Mini (front mount) fits? I've seen photos on your site and others with the Mundo with the YEPP Mini but I'm not sure if the Mundo in the pictures was the latest version. I'm wondering if they changed the handlebar stem on the newest version. (Update: Patrick and family got their Mundo and their Mini Yepp! congratulations!!!)


My Mundo is the v.4 (latest version) and when I was looking all over for a front mounted seat, I could find all the photos of Mini Yepps, iBerts, and Bobikes but no one ever detailed how the installation went. Therefore, I just assumed the Mini Yepp would work easily. We had already tried the iBert and I didn't like the way it felt riding with it or the way Little Brother fit in it. It got in the way of my cables, scratched up the bike, didn't provide much back support, and the shoulder straps never seemed to stay up. The mount was difficult to take on/off and if the baby seat wasn't on, that mount looked like an injury waiting to happen. That said, some people love it. I don't. 

What happened when I went to install my Mini Yepp mount, I quickly realized that my stem was too thick. Some internet searching later and I found out that it is not made for a threadless stem as it's too thick. I was incredibly frusterated because I had been so sure that it would work. I did some more searching and found an adaptor for mountain bikes/threadless stems but everywhere I looked, it was always out of stock in the USA. Jose took a look and figured out that the mount had spacers in it and when he removed the spacers, it clamped on the stem, no problem. That was fine until a day or so later, I noticed that the Yepp was sliding all around when we rode. Turns out, it was clamped well onto the spacers but the spacers were moving freely, round and round, taking Little Brother with them. Bummer. More research later (ie. reading customer reviews) and I saw that someone mentioned that they just took out the spacers and clamped the mount directly onto the fork. I took the bike into Practical Cycle and talked with Tim who said that would be fine. The mount would act as the spacers in that situation. We gave it a go and many miles later, the Mini Yepp is still holding strong. I kept the spacers for when I no longer need the mount, I'll still be able to put it all back together. 

However, when I went to add the windshield, I found that there wasn't enough space between the mount and the stem so I then had to add a stem riser. Now, it's pretty perfect. It was a bit of a hassle to finally get here, but it does work. I love the Yepp seat, it's comfortable and lightweight. It's a better position for the little guy and for me to ride. The windshield is invaluable if you plan on riding regularly and gives you a foundation to put together a weather protector. 

That said, the v.4 Mundo can come with either a threaded stem (quill) or a threadless stem. Jose is a bike snob and won't even consider a bike with threaded stem (he's got roadie mentality and I actually got a threadless stem by chance). I really recommend getting a threaded stem if you are going to go with a front mounted seat like a Mini Yepp. It will just make life easier and you'll be out riding with your wee one quicker without as many headaches as I had. 
Picture
Looks like everyone fits on the Mundo happily!
0 Comments

Everyone asks: Weather Protectors

5/22/2012

7 Comments

 
I have gotten more questions about the sun hoods than anything else on our bikes. Here is a write up about how I put them together and how they work for us.
Picture
It is very important that if you are going to be out riding with the kiddos that they stay comfortable. I was worried about the impending summer heat and UV rays so I quickly set about fixing a weather protector for my two boys. We ride our Mundo "minivan" a lot! I had seen one done for the Peanut Shell that I tried but wasn't able to get it to work as well as Lindsay was and I still didn't have a solution for Little Brother up front. After a bit more searching on the Great Internet, I came across another design. This one used Kelty Sun Hoods (mine were on sale for $15) for backpacking backpacks. I liked that these gave full overhead protection as well as a bit of a screen in front. Sacramento gets lots of dust and debris so this gives me a little peace of mind when we are forced to ride through the cottonwood forests. 

For the Peanut Shell, I followed the blog's directions and drilled two holes along the top of the seat and two more on the sides. The original design had the holes in the front bar but with Big Brother getting bigger, he already has trouble getting in and out with the bar, I often take it off. I didn't want the poles to poke him in the legs. A couple of grommets and some electrical tape to keep them from falling off (you might want to get tighter grommets) and it was good to go. The front poles don't even have anything holding them in. Big Brother is able to pull them out but the angle that they go into the holes makes it so they don't fly out on their own. 
Picture
Picture
Finished product.
The Mini Yepp was actually even easier to put together since I didn't have to drill any holes, thanks to its holey design. I was using the Yepp Mini Windshield to keep the debris out of Little Brother's face ever since I found a stick in his eye. That worked pretty well but I still wanted the sun/rain protection. I was a bit worried that the cover would impair my riding since it makes it impossible for me to see the ground directly in front of me but as it turns out, I don't ever really look at the ground directly under me while riding. The only issue is that I can't see my bike computer to find out how fast I'm riding unless I peer around the cover. That's probably a good thing for me not to focus too much on it anyway. 

I first attached the back poles with a couple of zip ties and tucked the ends of the poles into the bottom bars of the seat's frame. It is the opposite of the Peanut Shells design where I have a lot of pole in the front and not so much in the back. The Mini Yepp has most of the cover's pole in the back and not as much hanging off the front. For the front attachments, I have the cover hanging over the windshield and am using outdoor Velcro to adhere it on. The little velcro straps of the cover loop around the velcro and are holding, so far. I worry about the heat melting off the adhesive but if needed, I can either drill holes into the Yepp bolster or use ties to attach the cover's loops to the handlebars/Yepp's handlebars. I've even ridden the bike without the front poles attached and unless there is a strong wind, it's not a problem. I wouldn't recommend riding like that always but if the velcro were to come off, you could still get to where you needed to go and ride until you had a chance to fix it. 
Picture
Zip ties
Picture
I have since replaced the velcro and used a bigger piece on each side.
The sun shades/weather protectors have been a great addition. It gives the boys their own little "pod" and more protection from the elements and maybe even a little more privacy. Bikers are exposed more than drivers and we get a lot of attention where ever we go. I'd like to think that this helps my wee ones feel a bit more protected and keeps them from being too overstimulated. The covers also say that they are "rain resistant." We haven't had any downpours yet but it will be nice to have something to keep them a little dryer and warmer as the seasons turn. This also provides a great foundation for any added stroller rain/sun covers that I might want to add in the future--which would probably be necessary if you lived in a climate with more extreme weather than Sacramento. 

It is a little more work to get the boys in and out of their seats but not by much. Both designs leave the poles free enough to easily pull out and tuck back in as needed. Big Brother does this on his own while getting in and out. Little Brother can usually get in/out without changing the poles but if needed, I can open the velcro tabs and tuck one of the poles out of the way, opening the cover up. The amount of protection if gives makes it totally worthwhile. As long as my boys are happy, comfortable, and safe, we'll be able to ride forever. 
Picture
Cozy, cozy!
Picture
Portable crib! (The amount of velcro has drastically increased for more durability).
Picture
Happy riders!
7 Comments

New Questions Forum!

4/11/2012

0 Comments

 
This is a bit of an experiment but I've been getting lots of questions that I think would be fantastic for everyone to know/consider/weigh in on. Use the contact form and we'll help you as best we can. Dialogues encouraged! Let's see how it goes...
0 Comments

    Ask Away!

    Post a comment here or use the Contact Us form and I will do my best to answer your questions. Dialogues encouraged! 

    Contents

    • Respectful Drivers and Bikers
    • Getting Started On A Cargo Bike
    • Weather Protection
    • Mini Yepp + Mundo

    Archives

    May 2015
    June 2012
    May 2012
    April 2012

    Categories

    All
    Cargo Bikes
    Carrying Kids
    Mini Yepp
    New Riders
    Safety
    Weather Protection
    Yuba Mundo

    RSS Feed

Powered by Create your own unique website with customizable templates.