I'm pleased to welcome a wonderful post by fellow biking parent, Gernot, who lives with his family in Thailand. We had emailed back and forth about the HaulaDay and I'm happy to share some of his experiences, starting with the work he put in to creating a mounting point for a generator light. Welcome, Gernot, to our Tiny Helmets blog and we look forward to learning more from you in the future! Take it away...
Gernot's introduction:
My wife and I have been living car free in Chiang Mai since 2008. We have two sons who are almost 3 and almost 5 years old. We have been shuttling the boys to and from daycare and kindergarten on a Rivendell Betty Foy and Sam Hillborne (both fantastic bikes) outfitted with front and rear child seats, as well as a motor scooter outfitted with a child seat (very common in Thailand). As the little one was soon going to be too big for the stem-mounted child seat, we settled on a Bike Friday Haul-a-Day as my wife's commuting and child shuttling solution.
Installing a generator headlight on the HaulaDay with factory front rack
We recently purchased a HaulaDay (HaD) after emailing back and forth with Elle, who was able to address some of my reservations. In a separate guest post I’ll go over the equipment choices we made, and how we feel about them. On the whole, it’s a fantastic bike!
Having grown up in Germany, I firmly believe that a city bike should have a kickstand, fenders, chain guard, and generator lights, so I ordered the HaD with the generator hub, even though Robert from Bike Friday was unable to give me good answers as to where to place the headlight. In general though, Robert was extremely helpful and responsive in the ordering process.
The logical place for a headlight on a bike with 20” tires is the fork crown. It’s about the perfect height for the best road illumination, it’s relatively close to the hub for easy cable routing, and it’s out of the way and protected from bike racks and such. Unfortunately the superb front rack and basket of the HaD seemed to sit too low over the front tire to allow for a fork-crown-mounted headlight. I ordered a B&M Eyc T Senso Plus headlight due to its reasonable price and stellar performance, not thinking much about its diminutive size. See the first light on this page for a detailed description: http://www.peterwhitecycles.com/b&m-hl.asp.
Once I put the bike together, I got out the headlight and hoping against hope, tried to fit it under the front rack: no dice, the light wouldn’t fit. However, looking at the fork crown mount, I realized that I could bend it down without having the tire get in the way of the light beam. These fork crown light mounts are tall enough to accommodate 700C tires whose apex sits quite a bit higher than the fork crown, but with a 20” tire I thought I could bend the arms of the mount down to clear the front rack above, without having the tire block the light beam. A bigger light than the Eyc probably wouldn’t fit even with a modified mount, so I was very glad to have ordered this tiny light.
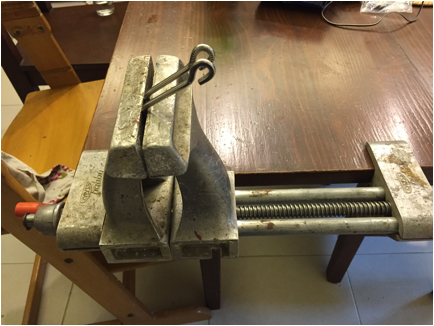
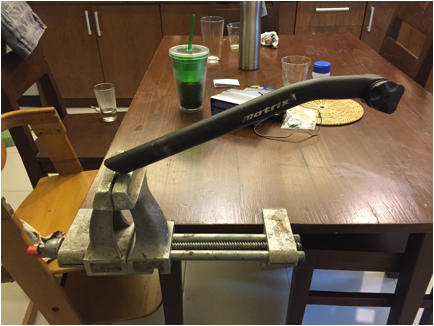
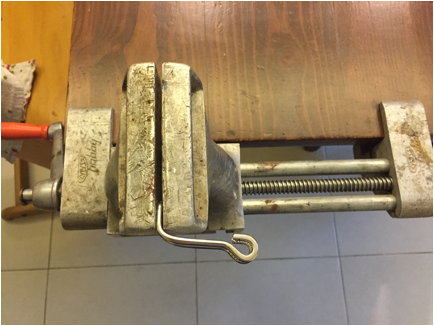
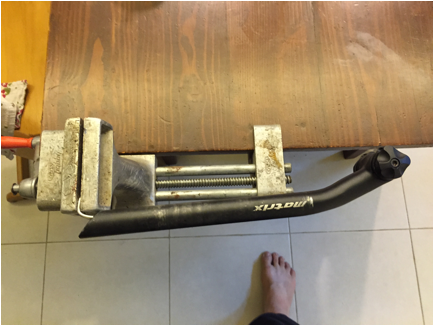
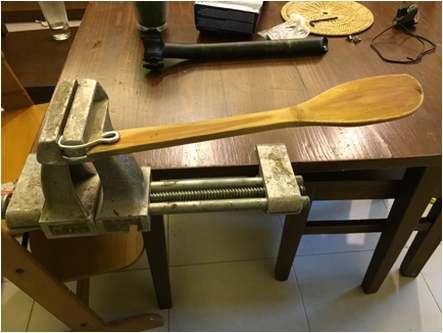
I clamped the fork crown side of the light mount into my vise, and used an old seatpost to gain leverage on the forward extension of the mount:
We recently purchased a HaulaDay (HaD) after emailing back and forth with Elle, who was able to address some of my reservations. In a separate guest post I’ll go over the equipment choices we made, and how we feel about them. On the whole, it’s a fantastic bike!
Having grown up in Germany, I firmly believe that a city bike should have a kickstand, fenders, chain guard, and generator lights, so I ordered the HaD with the generator hub, even though Robert from Bike Friday was unable to give me good answers as to where to place the headlight. In general though, Robert was extremely helpful and responsive in the ordering process.
The logical place for a headlight on a bike with 20” tires is the fork crown. It’s about the perfect height for the best road illumination, it’s relatively close to the hub for easy cable routing, and it’s out of the way and protected from bike racks and such. Unfortunately the superb front rack and basket of the HaD seemed to sit too low over the front tire to allow for a fork-crown-mounted headlight. I ordered a B&M Eyc T Senso Plus headlight due to its reasonable price and stellar performance, not thinking much about its diminutive size. See the first light on this page for a detailed description: http://www.peterwhitecycles.com/b&m-hl.asp.
Once I put the bike together, I got out the headlight and hoping against hope, tried to fit it under the front rack: no dice, the light wouldn’t fit. However, looking at the fork crown mount, I realized that I could bend it down without having the tire get in the way of the light beam. These fork crown light mounts are tall enough to accommodate 700C tires whose apex sits quite a bit higher than the fork crown, but with a 20” tire I thought I could bend the arms of the mount down to clear the front rack above, without having the tire block the light beam. A bigger light than the Eyc probably wouldn’t fit even with a modified mount, so I was very glad to have ordered this tiny light.
I clamped the fork crown side of the light mount into my vise, and used an old seatpost to gain leverage on the forward extension of the mount:
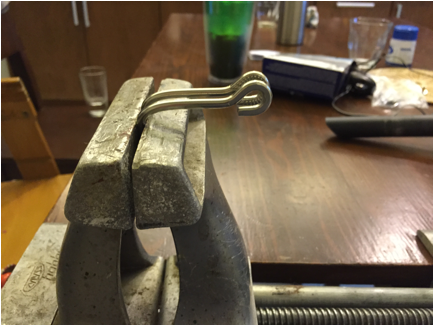
After bending the arms down from about 120 to 90 degress, I reinstalled the light and tried it out:
Still no dice: the light still didn’t clear the front rack supports, but it also became clear that I could bend the mount past 90 degrees without having the tire interfere with the light beam. Back in the vice the mount went.

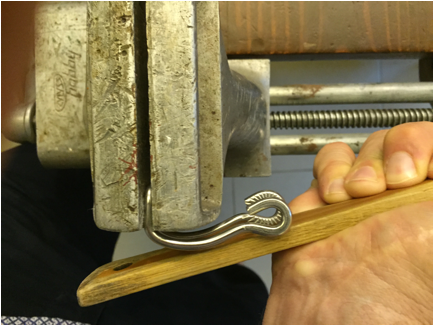
Unfortunately the round cross section of the seatpost also bent the two arms of the mount towards each other, which I corrected using a bamboo spatula. :)
I couldn’t bend the arms any farther with the seatpost, but I realized I could use the spatula to bend one arm at a time by pressing the spatula against the top side of each arm:
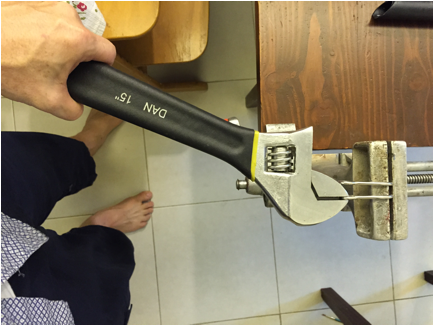
However, there was still a bit of sidebend in the arms, which I corrected with a crescent wrench:
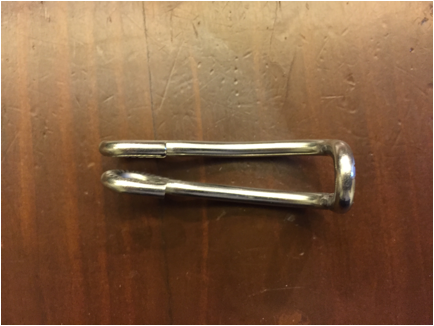
Before and after:
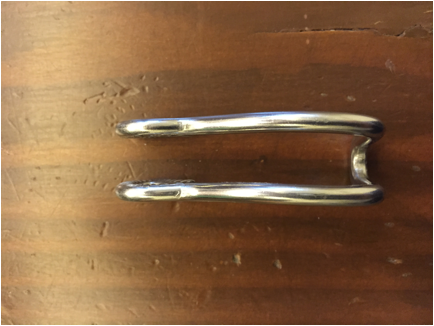 | 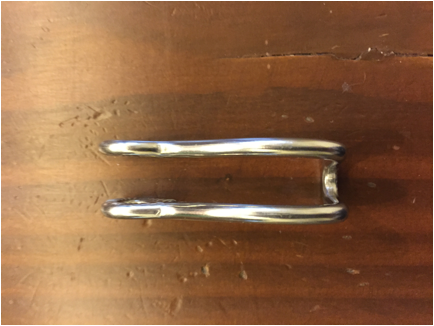 |
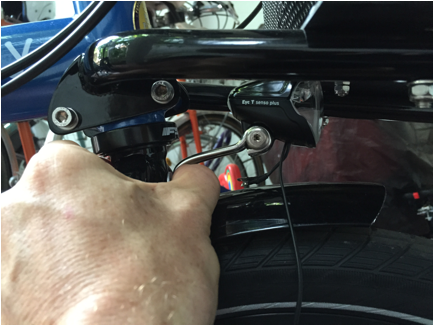
Try again: the light fits!
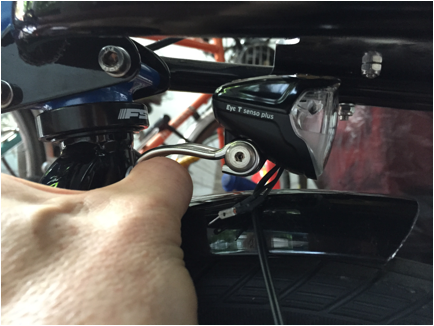
To attach the light in such a tight space it’s nice to have ratcheting wrenches:
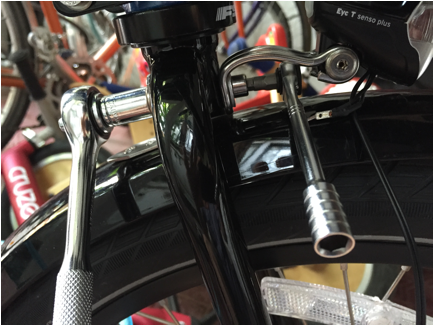
The light sits low enough that the fork can be turned 180 degrees to shorten the wheelbase in order to fit the bike on bus bike racks:
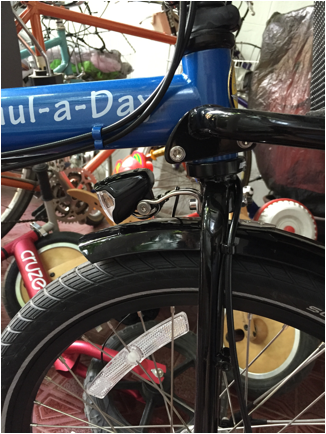
Now for the connection to the hub. I wrapped the cable around the right side of the light mount and the fork and secured the bottom end with a ziptie:
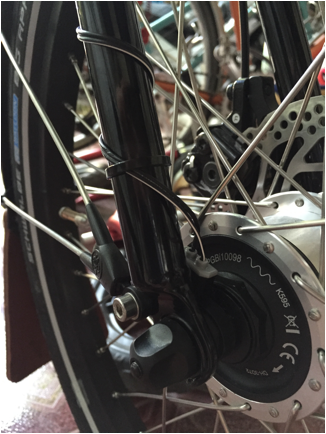
The light has two extra cables exiting from it with spade connectors for attaching a taillight. (I used a battery-powered taillight, if for no other reason than avoiding cable routing complications with the telescoping frame, so I didn’t need these connectors. Given how little we ride after dark, a taillight powered by 2 AAA batteries will work for months if not years before needing a battery replacement) I wrapped the generator cable around these short cables to keep them out of the way This turned out to be not a good idea as the spade connectors shorted out against the metal light mount and the light wouldn’t work. Instead one ought to isolate and protect the spade connectors with some shrink tubing or electrical tape before wrapping them against the light mount. I ended up just pulling the spade connectors out from under the generator cable so they wouldn’t touch metal and short out. I’ll put some shrink tubing on them later.
For connecting the cable to the generator hub, the Shimano service manual is actually quite helpful: Here is a link to the pdf: http://www.rideyourbike.com/images/leapfrog/nx70instructions.pdf
Cut the cables to the proper length. If they end up too short, you can always unwrap the cable from the fork one turn. I don’t have proper wire strippers, and instead of stripping the insulation from the second wire, I cut through the wire making it too short, so I had to resort to unwrapping the cable from the fork one turn. Make sure the cable with the white stripe on the insulation goes to the ground terminal, marked on the hub connector with a pitchfork.
Cut the cables to the proper length. If they end up too short, you can always unwrap the cable from the fork one turn. I don’t have proper wire strippers, and instead of stripping the insulation from the second wire, I cut through the wire making it too short, so I had to resort to unwrapping the cable from the fork one turn. Make sure the cable with the white stripe on the insulation goes to the ground terminal, marked on the hub connector with a pitchfork.
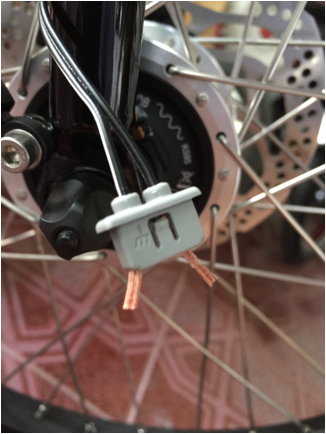
Flip the connector over, lay the bare wires in the parallel grooves, and slide the black part of the connector onto the grey part until it snaps into place.
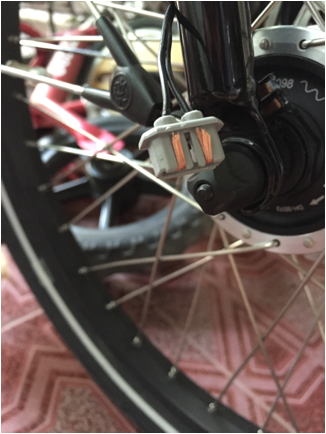
Then snap the connector onto the hub. It only goes on one way. If there is too much slack in the cable, you can rotate the hub body (after undoing the quick release) to move the connector slightly farther away, so the cable can’t get caught in the wheel, but leave a little bit of slack. Like so:

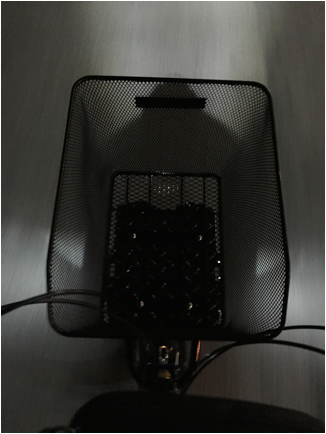
Done. If the light doesn’t work, make sure the taillight connectors are not touching metal or each other. Here is a photo of the light from the front:
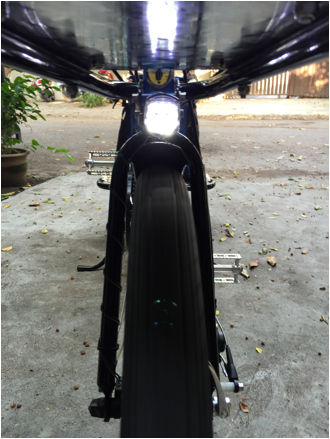
And here is a photo of the light beam produced by the light. The light sits slightly lower than is ideal, evidenced by the shadow of the fender and tire visible on the road, but since the shadow doesn’t extend farther forward than the edge of the basket, it’s not actually an issue. Most other lights won’t illuminate the road this close to the bike anyway if aimed properly for distance illumination, and if you mounted the Eyc on the handlebars, the basket would throw a much longer shadow, and potholes in the road would be less visible.

 RSS Feed
